Pages

Friday, December 24, 2010

A Christmas Eve flurry

cardstock snowflake ornament

Feed Dog Flurry 
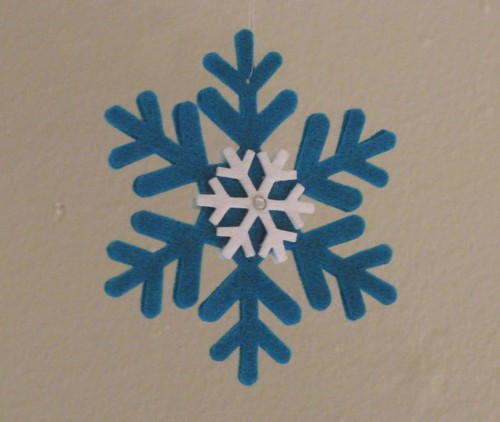
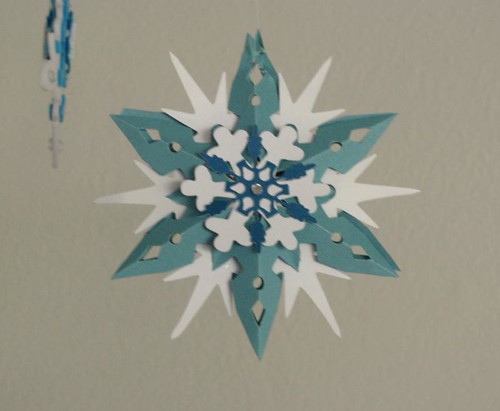
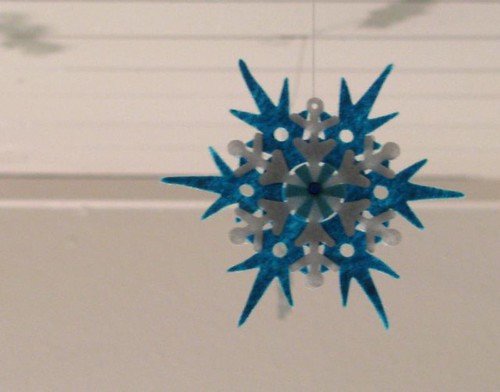
The big day is almost here, and there’s so much more I wanted to share with you! And more things I wanted to make for gifts, and gifts that haven’t even been shipped yet…but instead of lamenting what didn’t get done, I thought I’d celebrate something I did do with one last burst of snowflake ornament photos. Mostly felt with some cardstock ones mixed in this time, cut with a ballooning collection of Sizzix snowflake dies and glued together in the spare moments amid Christmas crisis control.
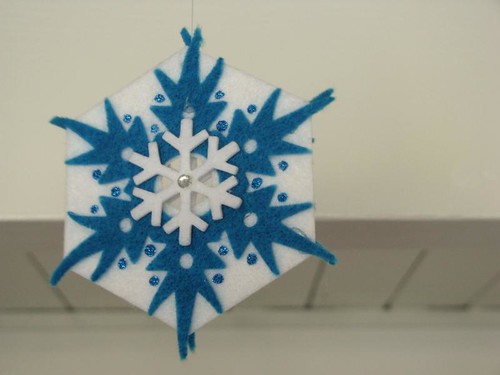
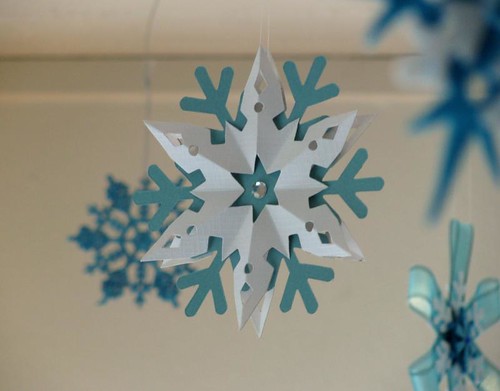
Hope you all have a lovely Christmas!

5289089719

5289692742

5289692714

5289089607

5289692650

5289089499

5289089435

5289692406

5289089531

5289089323

Thursday, December 23, 2010

Free printable snowflake fabric

printable snowflake fabric

Feed Dog Flurry Print your own version of the snowflake fabric I drew for my Christmas cards! Just download the PDF file, print on an 8½×11" sheet of printable fabric, and cut the swatches out for use in your own projects. Then drop me a line—I’d love to see how you use them!

Wednesday, December 22, 2010

Holiday cards, part II: removable fabric charm squares

piles o' Christmas cards

Feed Dog Flurry Christmas cards are out—hurrah! I’ve already shown you the fabric I drew in part I, so today I’ll show you just how I incorporated the fabric into the cards.

After much deliberating and prototyping, I decided everything would be much easier if I cut my fabric into mini charm squares—that is, 4" squares rather than the “official” charm square dimensions of 5". Shrinking to that size meant I could still feed the cards through my Sizzix BigKick machine for cutting and embossing without resorting to a nonstandard envelope size. So I made my cards A2 size, or a 5½×8½" sheet (half a letter-size page) folded in half, and may I just say that this designation is tremendously confusing as it has nothing whatsoever to do with international standard “A” paper sizes, by which “A2” would be about 4 times the size of letter paper. Anyway, now I know. And so do you, in case it ever comes up on Jeopardy.

card without fabric

I printed my text and a snowflake on the inside of the card so it would be visible when I cut a window out of the front using a Sizzix Movers & Shapers snowflake magnetic die (you could cut a window whatever shape you want with a craft knife, of course). I embossed the card fronts with their Snowflakes #6 and Snowflakes #2 Textured Impressions folders after cutting the windows.

freezer paper card innards

So here’s the trick: inside the card is a sheet of freezer paper that simultaneously explains to the recipient that yes, you should pull the card apart, and holds the charm square in place until the peeling commences. To hold the 4" square of fabric on the 4¼×5½" panel of the card, I set up 4⅛×5" freezer-paper labels, printed four on a page with an inkjet printer, and cut them to size. Precut letter-size freezer paper makes this a snap (and is a little meatier than the supermarket stuff), but you can cut regular freezer paper to page size for printing too.

charm square with freezer paper backing

Then place a charm square facedown on your ironing board, center a freezer-paper backing over it (shiny side to the fabric), and press the paper in place. When it’s cooled, peel the paper off your ironing board. There should be about ½" of freezer paper extending past the fabric on the top and bottom.

charm square adhered to card

Those ½" margins will adhere the freezer paper to the inside of the card front: iron them to the cardstock gently and they should stick well enough to hold the fabric in place without squashing the embossing. It doesn’t have to hold with the strength of a thousand men/women/beasts, since you’re telling people to tear it off when they get it.

front of finished card

Close the card up, and there’s the fabric! I could have drawn my snowflakes so they’d be centered in the window, but just cutting the fabric as it was leaves the snowflakes peering enticingly through the window.

card with stamped envelope

Since I was on a papercrafting kick, I stamped the envelopes to match. But hopefully the cards use papercraft to show that I’m a fabric guy while giving my contacts a little tidbit of handmade fabric for their stashes.

I’ve got a little something for my blog readers’ stashes, too, so stay tuned!

Tuesday, December 21, 2010

Holiday cards, part I: discharge-dyed snowflake fabric

snowflake fabric

Since most of my work deals with fabric, I wanted to use fabric in my business holiday cards, and I wanted to design it myself. Snowflakes turned out to be the perfect motif for trying out one of the brilliant techniques in Amy Karol’s Bend the Rules with Fabric: discharge dyeing with a bleach pen. It took a while to find the metal tips she recommends for getting fine lines, but I finally discovered a pack of bottles with similar fine metal tips in with the glass- and porcelain-painting supplies at Michaels (I saved the label for reference, but it’s likely hidden under a pile of junk; I’ll update with details when I find it).

snowflakes on lighter fabric

I drew the snowflakes on the fabric freehand, without a plan, just sketching with the bleach pen. Some of my flakes turned out better than others, but the bleach bleeding into the fibers gave the lines an almost glowing effect that I think looks quite cool. The color revealed by the bleach was a little different for each base fabric I tried.

snowflake fabric

I had previously accidentally spritzed some diluted bleach on this chunk of fabric, which added some background interest behind the flakes.

snowflake fabric

I’m itching to try some printing techniques to make more snowflake fabric (or wrapping paper!), but Christmas draws near and time grows short.

Next up, I’ll show you how I put removable charm squares of the fabric into my Christmas cards as tiny holiday presents.

Monday, December 20, 2010

Feeling unfestive

ornament broken by Felis Domesticus Minor

Feed Dog Flurry The day started with Felis Domesticus Minor shattering my favorite Christmas ornament, the fifth bauble to fall victim to her yuletide reign of terror. The previous casualties had been relatively simple ornaments, but this aqua starburst one will be sorely missed. The little dirtbag of a kitten has, unsurprisingly, made decorating for the holidays a challenge.

Felis Domesticus Minor perched

Oooo, doesn’t she look sweet perched on the pillow and tree skirt? Ha! You say sweet, I say smug. The reason the skirt was on the back of the chair in the first place was to halt her developing interest in it while it sat on the floor—you can see how well that worked.

With my computer behaving like a bratty child, professional exploits showing no signs of slowing, and gift lists languishing, I’m feeling the seasonal stress. According to the four places I checked tonight, it’s also too late to buy stamps for Christmas cards now, which really put me in a snit. So family, please excuse the late gifts, and business contacts, please excuse the late cards!

And readers, please excuse the cranky attitude. But while I’m in a strop, who better to give you an ornament tutorial than the bitch herself? Here’re a couple knotted ribbon star ornaments I made with instructions from Martha Stewart:

aqua ribbon star ornament

silver ribbon star ornament

Oh, that reminds me: Felis Domesticus Minor has been puking up ribbon all over the place too. Her charms never cease.

OK, venting over. Holiday cheer will return tomorrow.

Friday, December 17, 2010

Flower flakes (snowflake ornaments 11–12)

felt flower flake ornament

Feed Dog Flurry Here’s a dilemma faced by the prolific maker of felt snowflake ornaments: typical felt, whether wool or acrylic, isn’t really stiff enough to maintain an intricate flake shape while dangling from the ceiling. I’ve tried spray-starching the living daylights out of wool-blend felt, but that wasn’t entirely satisfactory, so I’ve ended up making most of the felt ornaments out of acrylic felt, using components cut from sheets of stiffened acrylic felt (“Friendly Felt”?) to give the ornaments some structure. That’s all fine, but the colors of stiffened felt available are limited—white’s really the only useful color for my nefarious purposes, and yes, snow is white, but so are my ceilings and walls, so white flakes don’t really stand out.

For these flakes, I stacked more colorful snowflake shapes on top of a six-petal flower. The flowers were cut with an Ellison die that’s been discontinued. Why bring up a die you can’t even get anymore? Well, if you have a full-size Sizzix machine, keep an eye on the Ellison clearance page—their AllStar dies are the same size as a Sizzix Bigz die and work exactly the same in a BigKick or Big Shot die cutter, and recently discontinued dies usually run about $5 on clearance. The Ellison dies are aimed at the education market instead of papercrafters, so they often have a broader range of simple shapes, which I find more flexible for felt and quilting projects.

The Sizzix Snowflake #2 die fits nicely inside the flower petals, as you can see above. And actually, I lied: I use the stiffened felt in white and white with glitter, not that you can tell the difference when the flakes are hanging above eye level.

felt flower flake ornament

The Sizzix Snowflake #3 die, on the other hand, is bigger than the flower. I took advantage of this by only gluing the snowflakes to the flower in the center so the outer points could curl forward and give a little dimension.

These ornaments, of course, also feature the by-now usual suspects of felt stickers, sequins, rhinestones, and glitter glue—a simple arsenal that’s produced lots of variations.

Thursday, December 16, 2010

Correction: Plaid Curves Table Runner

Plaid Curves Table Runner

We interrupt this flurry with an important announcement: if my Plaid Curves Table Runner in the fall issue of Stitch caught your fancy, do be sure to download the updated pattern from their website.

Midcentury snowflake quilt

snowflake quilt from IQSC

International Quilt Study Center, University of Nebraska-Lincoln, 1997.007.0682

Feed Dog Flurry Look what I found! I can’t remember exactly what inspired me to put “snowflake” into the search engine at the International Quilt Study Center, but this quilt came up. It was hand-appliquéd in about 1963 from a kit by the Paragon Company. I love the snowflake blocks, but that’s a crapload of needleturning! Next time I need to practice my points, maybe I’ll try one of the blocks—I think I’d be breaking out the fusible web to do a whole quilt.

Wednesday, December 15, 2010

Snowflake ornament 10

felt snowflake ornament, front

Feed Dog Flurry See, it’s not all hot glue and stickers over here! For this ornament I used the Purl Bee’s tutorial for Two-Sided Felt Snowflakes, and while they didn’t call for metallic thread, it seemed like a good opportunity to use a spool of silver thread I had sitting about—isn’t it nice how Christmas makes all bling excusable?

felt snowflake ornament, back

The finished back is a good feature, especially when you’re hanging it from the ceiling and letting it twirl in the breeze.

Tuesday, December 14, 2010

Tutorial: felt pinecone ornaments

felt pinecone ornaments

Feed Dog Flurry The Other promptly named these ornaments “butt stingers,” as this is apparently what they call pinecones in the land from whence he came. He insists he didn’t make the term up; nevertheless I’m a little disturbed. Whatever you call them, the pinecone ornaments turned out rather snazzy, if I do say so myself, and they have the added bonus of looking trickier than they actually are.

basic pinecone ornament

This is the basic version, but you can glam it up with glitter reminiscent of snow:

glittered pinecone ornament

Use white glitter if you really want it to look like snow. Or make mini versions with pinked edges:

mini pinecone ornament

So how do you make the stinkin’ stingers? Well, follow along…

Supplies

  • Aluminum foil
  • Felt (you’ll use long strips, so a small amount of yardage would be best; ⅛ yard is more than enough for one ornament)
  • Scalloping shears or rotary cutter with scallop blade (or pinking shears/blade for mini version)
  • Hot glue gun with glue
  • Heavy thread and hand needle
  • Glitter, white glue, and disposable plate (optional)


Instructions

  1. Form a wad of aluminum foil into a shape vaguely resembling a pinecone. I made mine tall and fairly slender, but there of course are fatter cones out there, so do as you like. This foil blob became the large light aqua pinecone:step 1: foil blob
  2. Cut a strip about ½" wide from the felt, as long as you can, using the scalloping shears or rotary cutter. (If you can find scalloping shears, let me know—I’m beginning to think their existence is a hoax.) You’ll probably need to cut more than one strip, and it’s OK to leave on the inverted-scallop edge from cutting the first strip (actually, it’s helpful; see step 7). Do as I say, not as I show: the strip pictured is wider than it needs to be; ½" is plenty.step 2: slice up felt
  3. Your strip probably won’t end with a neat scallop. Trim off any partial scallops to make it easier to overlap the ends.step 3: hack off ends
  4. If you want to make the glittered version, pour some white glue onto a plate. Drag the scalloped edge of the felt through the glue. Then sprinkle glitter over the glue on the felt and let dry. Shake off the excess glitter when dry and then proceed with the rest of the instructions.
  5. Hot glue the end of the felt strip to the bottom tip of the foil blob, extending the scalloped edge a little bit beyond the foil. Wrap the strip tightly around the end to completely hide the foil tip. Wrap and glue in small sections so the glue doesn’t harden before you’ve stuck the felt to it.step 4: wrap the tip
  6. Continue coiling the felt around the foil, overlapping the scallops so they look like individual scales. Add another strip if the first runs out, hiding the ends of the strips in the subsequent coils.step 6: coil around the foil
  7. The top of the ornament can be dealt with a couple of ways. As you can see in the photo above, the edge of my strip opposite the scallops had inverted scallop notches cut into it from a previous strip, and these notches helped the felt ease around the curved top:step 7: gather around the top
    Instead, you could cut a circle of felt with the same scallop edge and glue that on, as I did for the bright aqua pinecone:step 7: glue circle on top
    With the circle method, sew the hanging loop (next step) to the circle before gluing the circle in place.
  8. Cut a length of thread a little longer than twice the desired finished length of the hanging loop. Thread the needle with both ends and sew the ends through the top of the ornament (if using the eased-top method, bring the needle out between tucks). Remove the needle and tie the ends of the thread together securely. Trim the thread tails. If using the eased-top method, pull the hanging loop to bury the knot between the tucks and scales of the ornament; if using the circle method, hot glue the knot side to the top of the ornament.

That’s it! Play with different shears or blades to change the look of the scales and make a whole treeful.